
DIY Desktop Repair Tips for Beginners: Your Essential Checklist
Feeling frustrated with a slow or broken computer? Before you rush to a repair shop in Sheffield, this guide will empower you with the knowledge to tackle common desktop issues yourself.
A desktop computer that won't start, is running painfully slow, or is making strange noises can bring your work or leisure to a halt. For many people in South Yorkshire, the immediate thought is to search for "computer repair near me." But what if you could solve the problem yourself? With a bit of guidance, patience, and the right checklist, many common desktop issues are surprisingly fixable. This guide is designed for absolute beginners in Sheffield and beyond, providing a safe, step-by-step approach to diagnosing and repairing your desktop PC.

1. The Golden Rule: Safety First!
Before you touch a single screwdriver, your safety and the safety of your components are paramount. Electricity is dangerous, and static electricity can instantly kill delicate computer parts.
Essential Safety Precautions:
- Power Down Completely: Shut down the computer, turn off the power supply switch (if it has one), and unplug the power cord from the wall.
- Discharge Static Electricity: Touch an unpainted metal part of the computer case before handling any internal components. Better yet, use an anti-static wrist strap.
- Work in a Clean, Well-Lit Space: A clear table with good lighting prevents losing small screws and helps you see what you're doing.
- Be Gentle: Components don't require force. If something isn't slotting in easily, double-check the orientation; don't push harder.
- Keep Screws Organised: Use a magnetic tray or a small bowl to keep screws from different components separate.
2. The Diagnostic Checklist: What's Actually Wrong?
The first step to a repair is a proper diagnosis. Jumping in without understanding the problem can waste time and potentially cause more damage. Follow this logical sequence.
Symptom: The Computer Won't Turn On At All
If you press the power button and absolutely nothing happens—no lights, no sounds, no fan spin—the issue is likely with power delivery.
- Check the Basics: Is the power cord firmly plugged into the wall and the back of the computer? Is the wall socket working? Try a different appliance in the same socket.
- Inspect the Power Supply: Ensure the power supply unit (PSU) switch on the back of the case is in the "On" or "I" position.
- Test the Power Button: The connection from the case's power button to the motherboard can come loose. Open the case and check the small, labelled pins where the power button cable connects.

Symptom: It Turns On But No Display (The "Black Screen of Death")
The computer seems to power up (fans are spinning, lights are on), but you get no picture on your monitor. This often points to a graphics issue.
- Monitor & Cables: Is the monitor turned on? Is the video cable (HDMI, DisplayPort, VGA) securely connected to both the computer and the monitor? Try a different cable or monitor if possible.
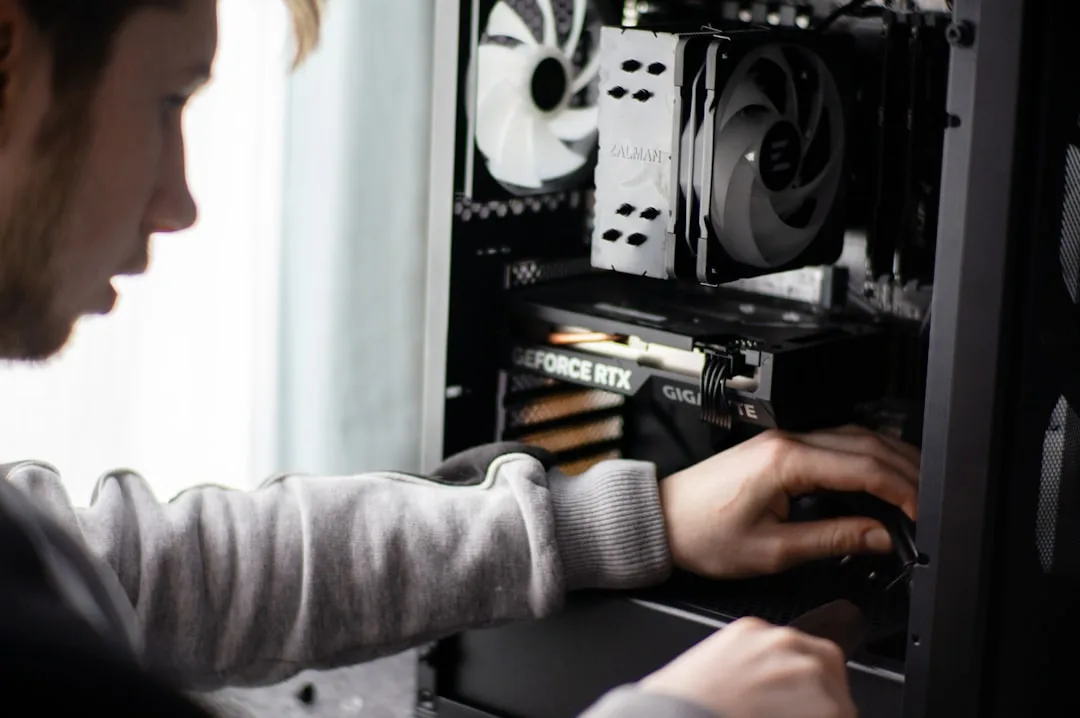
- Graphics Card: If you have a dedicated graphics card, ensure it is seated properly in its slot. The power cables from the PSU must be firmly attached to it.
- RAM (Memory): This is a very common culprit. Turn off the PC, unplug it, and reseat your RAM sticks. Push the clips down, remove the sticks, and then firmly reinsert them until the clips click back into place.
Symptom: It's Extremely Slow or Freezing
A slow computer is often a software issue, but hardware can also be to blame.
- Check Task Manager (Ctrl+Shift+Esc): See what processes are using your CPU, Memory, and Disk. A single program using 99% of your resources is likely the problem.
- Hard Drive Health: Older mechanical hard drives (HDDs) slow down as they age. Consider upgrading to a Solid State Drive (SSD)—it's the single best performance upgrade for an older PC.
- Overheating: Dust buildup can cause components to overheat and throttle performance. This leads us to our next section.
3. Essential DIY Cleaning & Maintenance
Regular cleaning is the easiest and most effective preventative maintenance you can perform. For many residents in Sheffield, where older homes can be dustier, this is especially important.
The Deep Clean: What You'll Need
- A can of compressed air
- Isopropyl alcohol (70% or higher) and cotton swabs
- A soft, anti-static brush (a new paintbrush works)
- A Phillips head screwdriver
Step-by-Step Cleaning Process
- Take it Outside: You'll be blowing out a lot of dust. Do this outdoors or in a well-ventilated area like a garage.
- Open the Case: Remove the side panel(s) of your desktop tower.
- Blow Out Dust: Using short bursts of compressed air, blow dust out of fans, heat sinks (the metal fins on the CPU and GPU), and the power supply. Hold fans still with a finger while blowing to prevent them from spinning too fast and damaging the bearings.
- Clean Contacts (Advanced): If you've removed components, you can gently clean the gold contact edges with a cotton swab lightly dampened with isopropyl alcohol. Let it dry completely before reinstalling.

4. Simple Upgrades for a Major Performance Boost
Sometimes, repair means enhancement. These two upgrades are beginner-friendly and can breathe new life into an aging desktop.
Upgrade 1: Installing More RAM
If your computer is slow when you have many browser tabs or programs open, more RAM can help.
- Check your motherboard's manual or use a tool like CPU-Z to see what type of RAM you need (DDR3, DDR4, etc.) and how many slots are free.
- Push the clips on the RAM slots down, align the notch on the RAM stick with the key in the slot, and press firmly on both ends until the clips snap back up automatically.
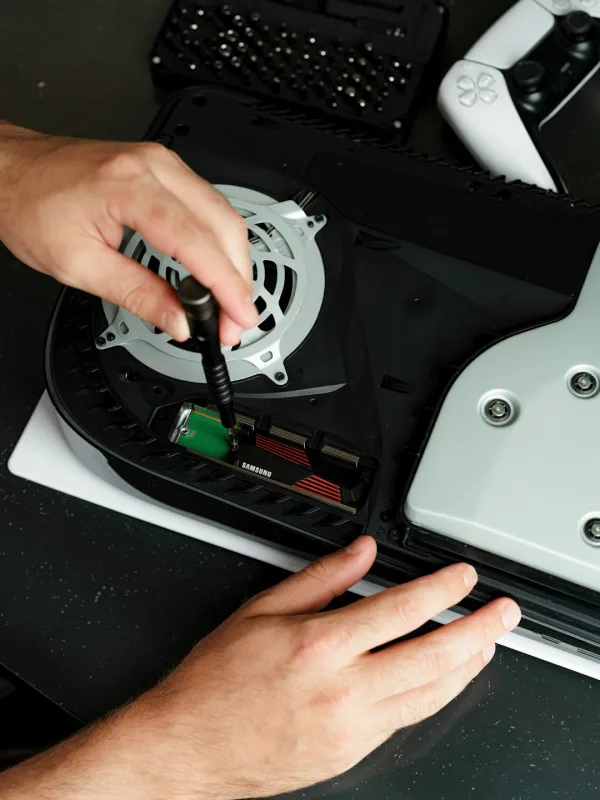
Upgrade 2: Replacing a Hard Drive with an SSD
This is the king of all upgrades. An SSD will make your computer boot in seconds and launch programs instantly.
- Buy a 2.5-inch SATA SSD and a SATA data cable if one doesn't come with it.
- Mount the SSD in a drive bay (some cases have tool-less brackets).
- Connect one SATA data cable from the SSD to a SATA port on your motherboard.
- Connect a SATA power cable from your power supply to the SSD.
- You will then need to clone your old drive or install a fresh copy of Windows onto the new SSD.
5. When to Call a Professional in Sheffield
DIY is empowering, but it's crucial to know your limits. If you encounter any of the following, it's time to seek help from a trusted local technician in South Yorkshire.
- Smell of Burning or Visible Damage: If you see scorch marks on the motherboard or smell ozone/burning plastic, stop immediately.
- Issues with the Power Supply Unit (PSU): PSUs contain capacitors that can hold a dangerous charge even when unplugged. Avoid opening them.
- Liquid Damage: If any liquid has been spilled on the PC, professional cleaning is required to prevent corrosion.
- You've Tried Everything and It Still Doesn't Work: A professional diagnostic can save you hours of frustration.
Frequently Asked Questions (FAQs)
How often should I clean my desktop computer?
For most home environments, a thorough clean every 6 to 12 months is sufficient. If you have pets or your home is particularly dusty (common in many older Sheffield properties), consider cleaning every 3-6 months.
Will opening my desktop void the warranty?
This depends on the manufacturer. Most desktop PCs aimed at enthusiasts allow user upgrades without voiding the warranty. However, breaking a "warranty void if removed" sticker on a pre-built system might be an issue. Always check your warranty terms first.
I'm nervous about static electricity. What's the best practice?
An anti-static wrist strap is the gold standard and is very inexpensive. Clip it to an unpainted metal part of the case. If you don't have one, make sure to periodically touch the metal case frame to ground yourself before touching any new component.
Conclusion: You've Got This!
Desktop computers are modular by design, making them far more repairable than most modern gadgets. By following this beginner's checklist—prioritizing safety, methodically diagnosing the issue, and performing basic cleaning and upgrades—you can solve a wide range of common problems. You'll not only save money but also gain a valuable sense of accomplishment and a deeper understanding of the machine you rely on every day.
Remember, every expert was once a beginner. Start with the simple steps, be patient, and don't be afraid to ask for help from the vibrant tech community online or from a local professional in Sheffield if you get stuck. Happy repairing!

0 Comments
Leave a Comment