
The Ultimate Guide to Repairing Your PlayStation Controller
Is your favourite DualShock or DualSense controller letting you down? From stick drift to unresponsive buttons, a faulty controller can ruin your gaming experience. Before you rush out to buy a new one, this comprehensive guide will walk you through diagnosing and fixing common issues, saving you money and electronic waste.
Essential Tools and Safety First
Before you start, gathering the right tools is crucial for a successful repair. Attempting to open your controller with the wrong equipment can cause permanent damage.
- Precision Screwdriver Set: You'll need a small Phillips head screwdriver (often #00 or #0 size). A set with multiple heads is ideal.
- Plastic Spudger or Pry Tool: Using a metal tool to open the case can scratch or crack the plastic. A guitar pick or a spudger is much safer.
- Tweezers: Essential for handling tiny screws and ribbon cables.
- Isopropyl Alcohol & Cotton Swabs: For cleaning electrical contacts and removing grime.
- Replacement Parts (if needed): Common parts like analogue stick modules, springs, and buttons are readily available online.
Safety Tip: Always power off your controller and disconnect it from your console or charging cable before beginning any repair. Work in a clean, well-lit area and keep track of your screws.
Step-by-Step: How to Open Your PlayStation Controller
This process is similar for most modern PlayStation controllers, including the DualSense (PS5) and DualShock 4 (PS4). The key is patience.
- Remove the Handgrips: Carefully slide your fingernail or a pry tool under the rubberised grip on the back of the controller. These panels pop off to reveal screws.
- Unscrew the Case: Remove the exposed screws. There are usually several, so make sure you find them all.
- Separate the Halves: Gently insert your pry tool into the seam between the front and back halves of the controller. Slowly work your way around the edges to release the plastic clips. Do not force it!
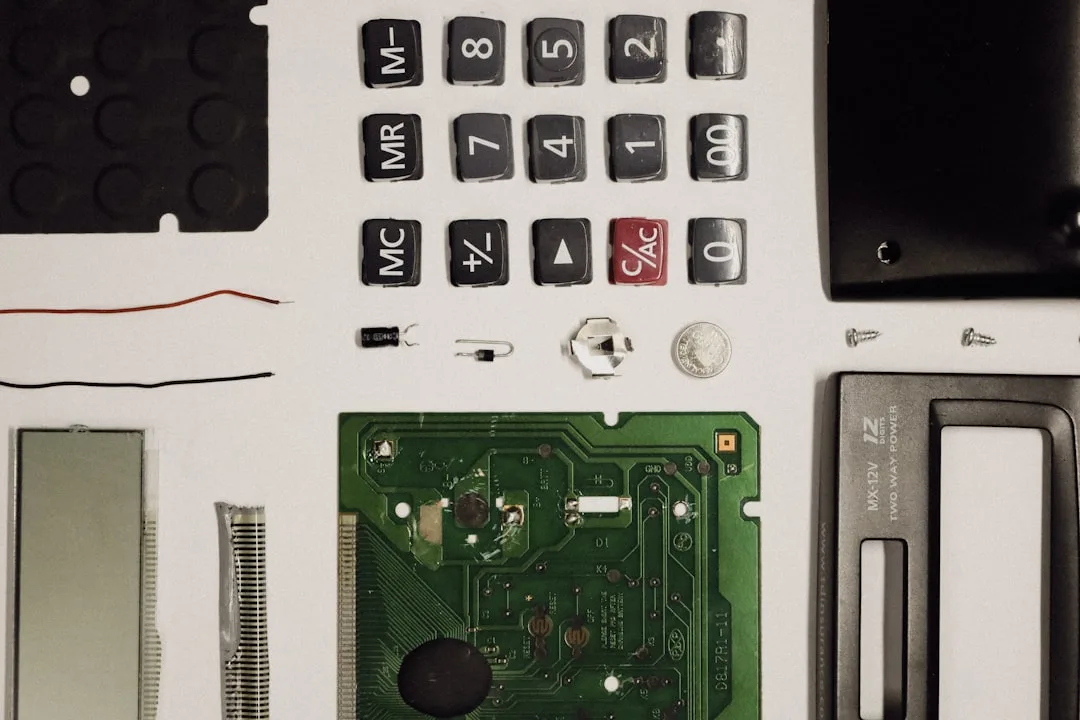
Once open, you'll see the internal board, battery, and various components. Be mindful of the ribbon cables connecting the touchpad (on PS4) or the battery to the main board.
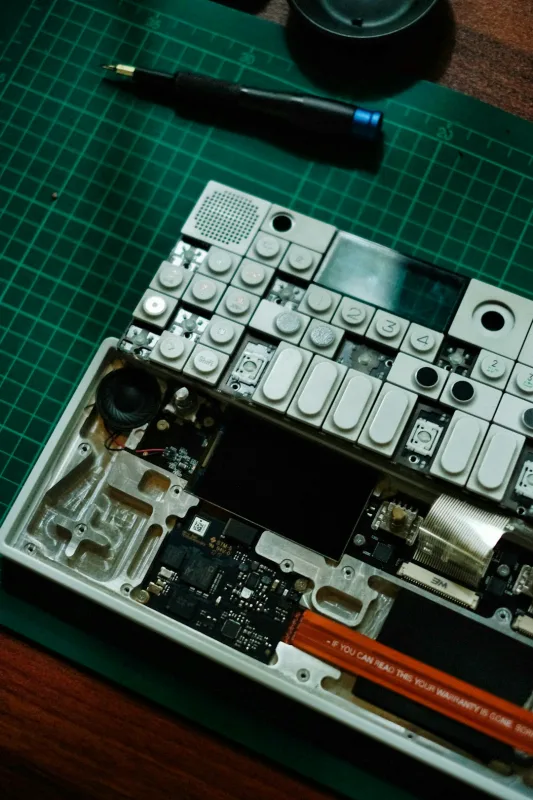
Fixing Common PlayStation Controller Problems
1. Analogue Stick Drift (The Most Common Issue)
Stick drift occurs when your controller registers movement without you touching the sticks. It's often caused by dust or worn-out components inside the analogue stick module.
- Cleaning: Sometimes, a simple clean can fix the issue. Use a cotton swab dipped in isopropyl alcohol to clean around the base of the stick. Gently rotate the stick to work the alcohol in and dissolve any grime.
- Replacing the Module: If cleaning doesn't work, the analogue stick module needs replacing. Desolder the old module from the main board and solder a new one in its place. This requires intermediate soldering skills.
For those in Sheffield, South Yorkshire, if you're not comfortable with soldering, several local electronics repair shops specialise in console repairs and can handle this precise job for you.
2. Unresponsive Buttons (X, O, Square, Triangle)
Buttons can become sticky or stop working due to spilled drinks, dust buildup, or worn-out conductive pads.
- Deep Cleaning: Remove the main board to access the rubber conductive pads and the contacts on the board. Clean both the pads and the board contacts with isopropyl alcohol.
- Replacing the Conductive Pad: If the pad is torn or has lost its conductivity, you can order a replacement membrane online. Swapping it out is usually a simple, solder-free process.
3. Broken R2/L2 Triggers
The adaptive triggers on the DualSense are particularly complex, but the springs in older controllers can also break.
Often, a small spring inside the trigger mechanism snaps. The fix involves opening the controller, removing the broken spring, and installing a new one. Replacement spring kits are inexpensive and widely available.
4. Battery Not Holding a Charge
If your controller dies quickly, the battery is likely the culprit. Replacing it is one of the easiest repairs.
- After opening the controller, locate the battery. It's connected by a ribbon cable or a simple plug.
- Gently disconnect the old battery.
- Connect the new battery, ensuring it's the correct model for your controller.
- Reassemble the controller and allow it to charge fully.
When to Seek Professional Help in Sheffield
While many repairs are DIY-friendly, some situations call for a professional. If you encounter any of the following, consider taking your controller to a specialist repair shop in South Yorkshire:
- You are uncomfortable with soldering (e.g., for analogue stick replacement).
- There is significant liquid damage on the main circuit board.
- The controller has more complex issues, like persistent connection problems.
- Your controller is still under warranty (opening it will void the warranty).
FAQs: Your PlayStation Controller Repair Questions Answered
Will repairing my controller void the warranty?
Yes, opening your PlayStation controller will almost certainly void the manufacturer's warranty. If your controller is less than a year old, contact Sony support first to see if you are eligible for a replacement.
Where can I buy reliable replacement parts?
Online marketplaces like Amazon and eBay have a wide range of parts. For the best quality, look for sellers with high ratings and positive reviews. Specific websites specialise in console repair parts and often offer higher-grade components.
Is it worth repairing an old PS4 controller?
Absolutely. Repairing is almost always cheaper than buying new, and it's better for the environment. A simple battery or button pad replacement can breathe new life into an old controller for a fraction of the cost.
Conclusion: Empower Yourself to Fix and Game On
Learning to repair your own gaming gear is an empowering skill. With a little patience and the right tools, you can solve the most common PlayStation controller problems, from frustrating stick drift to a dead battery. Not only will you save money, but you'll also extend the life of your equipment and reduce e-waste. So next time your controller acts up, don't despair—open it up and take a look!
Happy gaming!
0 Comments
Leave a Comment